

Guides

20 Aug 2026

Brick slips—also commonly called brick tiles—are thin sections of real brick used to recreate the appearance and texture of traditional brickwork without constructing a full brick wall. They offer the warmth, character and natural variation of genuine brick while requiring significantly less space and structural support.
Brick slips can be used on internal and external walls and, where the selected product is suitable, on floors. However, they must be installed using the correct substrate, adhesive, jointing and waterproofing system for the intended application.
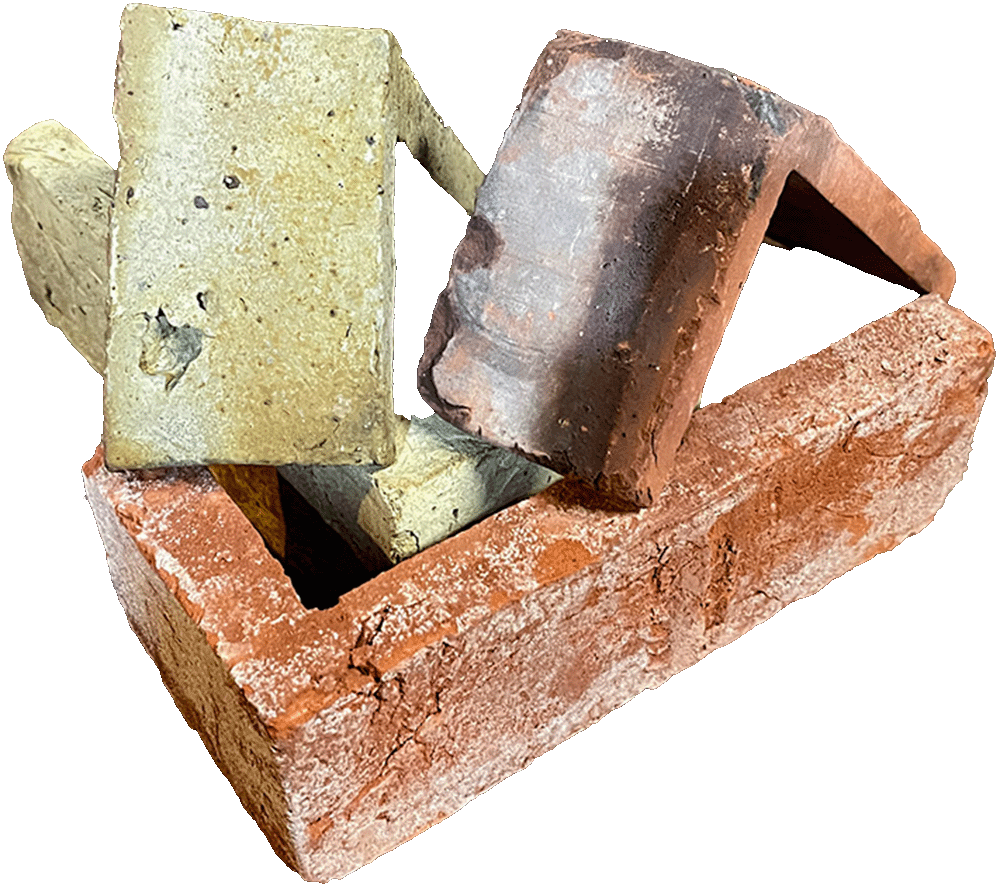
Brick slips are thin slices of brick, generally cut from the face of a full brick. Because they are made from genuine brick, they retain the colour, texture, irregular edges, firing marks and natural variation of the original product.
Unlike imitation brick panels or printed surfaces, brick slips provide the depth and tactile character of real masonry.
Brick slips may be produced from:
The thickness of a brick slip varies between products. Some lightweight slips may be approximately 10-15 mm thick, while slips cut from reclaimed or heavily textured bricks may be considerably thicker, around 22mm.
A full brick forms part of a masonry wall system. A brick slip is a decorative or protective surface finish that is adhered to a suitable supporting substrate.
The performance of a brick-slip installation depends on the complete wall or floor system behind it—not simply on the brick slip itself.
Brick slips are extremely versatile and can be used in many residential and commercial applications.
Common applications include:
Not every brick slip is suitable for every application. External walls, wet areas, fireplaces and floors all have different installation and performance requirements.
Because brick slips are cut from genuine bricks, they provide the same colour, texture and natural variation as traditional brickwork.
Brick slips are ideal where there is insufficient room for a full brick wall. This can make them particularly useful in renovations, internal spaces and projects where floor area is limited.
Brick slips are substantially lighter than full bricks, reducing the load placed on the supporting structure. The substrate must still be strong, stable and suitable for the combined weight of the slips, adhesive and mortar.
Brick slips can be incorporated into existing buildings without constructing a completely new masonry wall. They are often used to transform plasterboard, fibre-cement, concrete and masonry surfaces, provided the substrate and installation system are appropriate.
Brick slips cut from reclaimed bricks retain the patina, residual mortar, lime, weathering, chips and imperfections developed during their previous life. This character cannot be convincingly replicated by printed or moulded imitation products.

Consider the following before selecting a product:
Brick slips intended for walls are not automatically suitable for floors. Flooring products must be able to withstand foot traffic, impact, abrasion and cleaning.
Brick slips must be adhered to a solid, stable and appropriately prepared substrate.
Depending on the installation system, suitable substrates may include:
Plasterboard may be suitable for some lightweight internal wall installations, but its weight capacity and the suitability of the complete wall system must be confirmed before installation.
External applications require particular attention to structural movement, moisture management, waterproofing, control joints and weather exposure. Current NCC provisions require external wall cladding systems to satisfy applicable structural and weatherproofing requirements. The complete system should therefore be specified by an appropriately qualified building professional. National Construction Code—roof and wall cladding
Correct surface preparation is essential. The substrate should be:
Painted surfaces should not be assumed to provide an adequate bond. Paint may need to be removed so that the adhesive bonds directly to a suitable structural surface.
The adhesive manufacturer’s instructions must always be followed, including requirements for primers, membranes, movement joints, curing times and environmental conditions.
A high-quality adhesive appropriate for the brick slip, substrate, location and expected movement must be used.
The correct adhesive will vary depending on whether the application is:
Flexible polymer-modified adhesives are commonly used for many wall and floor applications, while specialised systems may be needed for difficult substrates or demanding environments. Product suitability must be confirmed with the adhesive manufacturer rather than selected on price alone. Australian adhesive manufacturers publish different substrate, location and movement limitations for each product.
Before fixing begins, open several boxes or pallets and lay out a representative selection of brick slips.
This allows you to:
For reclaimed and highly varied handmade products, slips should be blended from as many boxes or pallets as practical throughout the installation.
Natural variation should not be treated as a fault. It is an essential part of the character of genuine handmade and reclaimed brick.
A typical installation process includes:
Installation requirements vary between systems. Always follow the instructions supplied by the adhesive, waterproofing and pointing-material manufacturers.
Brick slips can be installed in most traditional brick bonds, including:
The selected bond can substantially change the appearance of the finished wall.
Joint widths are a design choice but must also accommodate the size variation in the bricks. Handmade and reclaimed slips generally require a more generous joint than highly uniform machine-made products.
Attempting to force variable handmade slips into narrow, perfectly uniform joints often creates an unnatural appearance and makes installation unnecessarily difficult.
Matching corner slips are commonly used around external corners, window reveals, columns and openings. An L-shaped corner slip gives the impression that a full brick continues around the corner.
Where matching corner slips are unavailable, the installer may use mitred cuts or another carefully planned finishing detail. These decisions should be made before installation begins, as corner treatment affects the setting-out of the entire wall.
Mortar colour and joint profile can dramatically affect the finished appearance.
Light mortar generally softens the brickwork and reduces contrast. Darker mortar defines each individual brick and makes the bond more prominent.
Common joint profiles include:
The most appropriate joint profile depends on the brick, architectural style and degree of weather exposure. External work generally benefits from well-compacted, weather-resistant joints that do not create ledges where water can collect.
Brick slips can be used for flooring, but only where the product is suitable for floor use.
They must be adhered to a rigid, properly prepared base such as:
Brick slips cannot be laid loose on sand like brick pavers.
Thickness variation is common, particularly with reclaimed and handmade products. This variation must be accommodated within the adhesive bed during installation.
A brick-slip floor will not have the perfectly flat, uniform surface of a porcelain tile floor. Slight variation in height, texture, edges and surface character should be expected and is part of the appeal of using genuine brick.
In wet or trafficable areas, slip resistance, waterproofing, drainage, sealing and cleanability must also be considered.

Brick slips can be used around many fireplace surrounds, but this does not automatically make them suitable for the inside of a firebox or areas exposed to direct flame and extreme temperatures.
Fireplace internals normally require purpose-made refractory fire bricks, refractory mortar and a compliant construction system.
Clearances to combustible materials and the fireplace manufacturer’s installation requirements must always be followed.
External brick slips must be installed as part of a properly designed façade or cladding system.
The design must consider:
Brick slips themselves do not waterproof a wall. The wall behind them must be designed and constructed to manage moisture correctly.
The safest cleaning method depends on the brick, mortar and type of contamination.
During installation:
Acid cleaning should never be treated as the default solution. Acid can alter brick colour, damage mortar, remove desirable lime and residual mortar from reclaimed bricks, or create additional staining if used incorrectly.
High-pressure washing can damage brick faces and joints. Where pressure cleaning is approved, use a diffuse spray, maintain an appropriate distance and follow the brick supplier’s recommendations.
Brick slips do not always require sealing.
A suitable breathable sealer may be helpful in areas exposed to:
Sealing can change the colour, sheen and moisture behaviour of brickwork. Always test the selected sealer on spare slips or an inconspicuous section before treating the entire area.
No two genuine handmade or reclaimed brick slips will be exactly alike.
Variation may occur in:
This variation is not something that should be completely designed out of the finished work. It is the quality that gives genuine brickwork its warmth, depth and individuality.
Samples should be treated as an indication of the product rather than an exact representation of every brick that will be supplied.
Brick slips allow the authentic character of real brick to be introduced into places where full brickwork may be impractical. They can transform a plain wall, add warmth and texture to an interior, reproduce historic brickwork or create a contemporary architectural façade.
A successful result depends on more than choosing the right brick. The substrate, adhesive, setting-out, blending, mortar, joint profile, workmanship and cleaning method all contribute to the finished appearance and long-term performance.
Take the time to understand the product, plan the installation and engage an experienced professional where required. Genuine brick slips are naturally varied and perfectly imperfect—and that individuality is exactly what makes them so appealing.
This guide provides general information only. Substrate preparation, structural support, waterproofing, fire compliance, adhesives and installation requirements must be assessed for each project. Always follow the National Construction Code, relevant Australian Standards and the written instructions of the product and installation-system manufacturers.
20 Aug 2026

06 Aug 2026

28 Nov 2024

14 Oct 2024

19 Jun 2024

20 May 2024
25 Aug 2023