

Projects
Trends
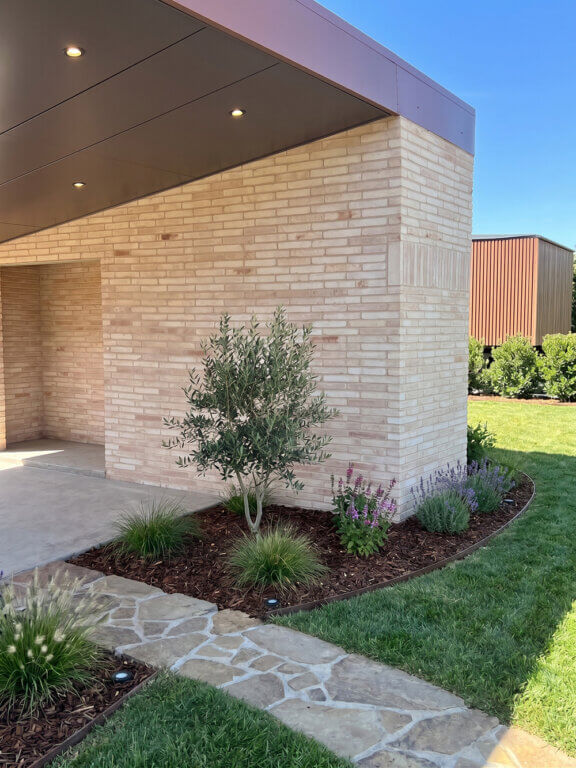

White, ivory and cream bricks can create a beautifully understated façade, bringing softness, texture and natural variation to both contemporary and traditional architecture. However, their light colour also means that construction marks, environmental staining and normal weathering will be more visible than they would be on darker brickwork.
A successful result depends on more than simply choosing the right brick. Brick selection, storage, mortar, laying technique, moisture management, cleaning and ongoing maintenance must all be considered before construction begins.
White bricks should not be expected to behave like a perfectly uniform white porcelain tile or painted surface. Depending on the product, natural variation may include:
These characteristics give white brickwork its depth and individuality. They should be understood and accepted before the bricks are ordered.
White bricks are also naturally more likely to show dust, pollen, pollution, stormwater marks and organic staining. This is not an indication that the brick is defective; it is simply more visible against a light-coloured surface.
Consider the building’s environment before selecting a white brick. The likelihood of visible staining may be greater where brickwork is:
Horizontal and near-horizontal surfaces will generally require more maintenance than vertical walls because they collect dirt and remain wet for longer.
Where maintaining a consistently clean, pale appearance is particularly important, sealing may be worth considering.
A single brick cannot represent an entire wall, particularly when selecting handmade or reclaimed bricks. View:
White bricks can appear substantially darker when wet. White bricks, for example, may take on a coffee-like colour when saturated before returning to their normal pale appearance once completely dry.
Mortar can also dramatically change the overall appearance. A sample panel should include the proposed mortar colour, joint profile and cleaning method—not just the selected brick.
Poor storage can introduce moisture and contamination before construction has even begun.
Bricks should:
Elephant Brick Co recommends cutting ventilation openings in the pallet wrapping so the bricks can breathe without being directly exposed to the weather. Saturated bricks can contribute to efflorescence and other moisture-related staining. Brick Wall Construction Guide
White, handmade and reclaimed bricks must be blended during laying. Bricks should be drawn vertically from several pallets at the same time rather than completing one pallet before opening the next.
Blending distributes variations in:
Failure to blend can result in obvious patches, bands or changes in colour across the finished wall. These become much more difficult—and often impossible—to correct after laying.
For reclaimed bricks, blending from at least six pallets at a time is recommended wherever practical.
Mortar represents a significant proportion of the visible wall and can either complement or overwhelm a white brick.
White or warm off-white mortar is generally recommended because it:
Mortar should be accurately batched throughout the project. Changes in cement, lime, sand, water content or additives can produce visible colour differences.
Overly wet mortar should be avoided. It is more likely to smear across the brick face and may increase the movement of moisture and salts through the wall. Excess cement or lime can also contribute to efflorescence.
For many white bricks, a flush or very shallow-raked joint creates the most cohesive finish. Flush joints can also improve weather resistance by reducing ledges where water and dirt may collect.
The joint should be finished when the mortar is firm enough to hold its shape but remains workable. If it is finished while excessively wet, cement-rich mortar may be smeared over the brick face.
A lightly wet-sponged flush joint can work particularly well with some white bricks.
Always confirm the approved jointing method for the particular brick before work begins.
Good brick cleaning begins with good bricklaying.
Cleaning should not be treated as a final attempt to repair carelessly laid brickwork. Mortar dags should be cut away with a trowel and dry-brushed once the mortar is no longer wet or tacky but is still sufficiently soft to remove.
Dry brushing at the correct time:
Scaffolding and the wall below the active work area should also be kept clean. Mortar droppings from upper levels should not be allowed to harden on completed brickwork.
Excessive water entering partially completed walls is a major contributor to staining. During construction:
Moisture can dissolve salts within bricks, mortar and surrounding materials and transport them to the surface. Reducing water penetration is generally more effective than repeatedly cleaning the symptoms.
All clay bricks are porous and can absorb and wick water. A correctly positioned physical damp-proof course prevents ground moisture from rising through the wall.
As a general rule, the DPC should be at least 150 mm above the finished landscape surface and must remain visible. Some reduced clearances may be permitted in protected or appropriately paved situations, so the project must be constructed in accordance with the applicable National Construction Code requirements.
After construction, soil, garden beds, mulch and paving must not bridge the DPC. A bridged or incorrectly positioned DPC can lead to:
Further information is available in Elephant Brick Co’s Damp-Proof Course Guide.
There is no single cleaning chemical suitable for every type of brick stain. A product that removes one contaminant may permanently worsen another.
Before cleaning, determine:
Always complete a test on a small, inconspicuous area and allow it to dry completely before treating the full wall. The appearance of wet brickwork is not a reliable indication of the final result.
Think Brick Australia’s technical guidance recommends using its Clay Masonry Cleaning Manual to identify stains and select the appropriate treatment.
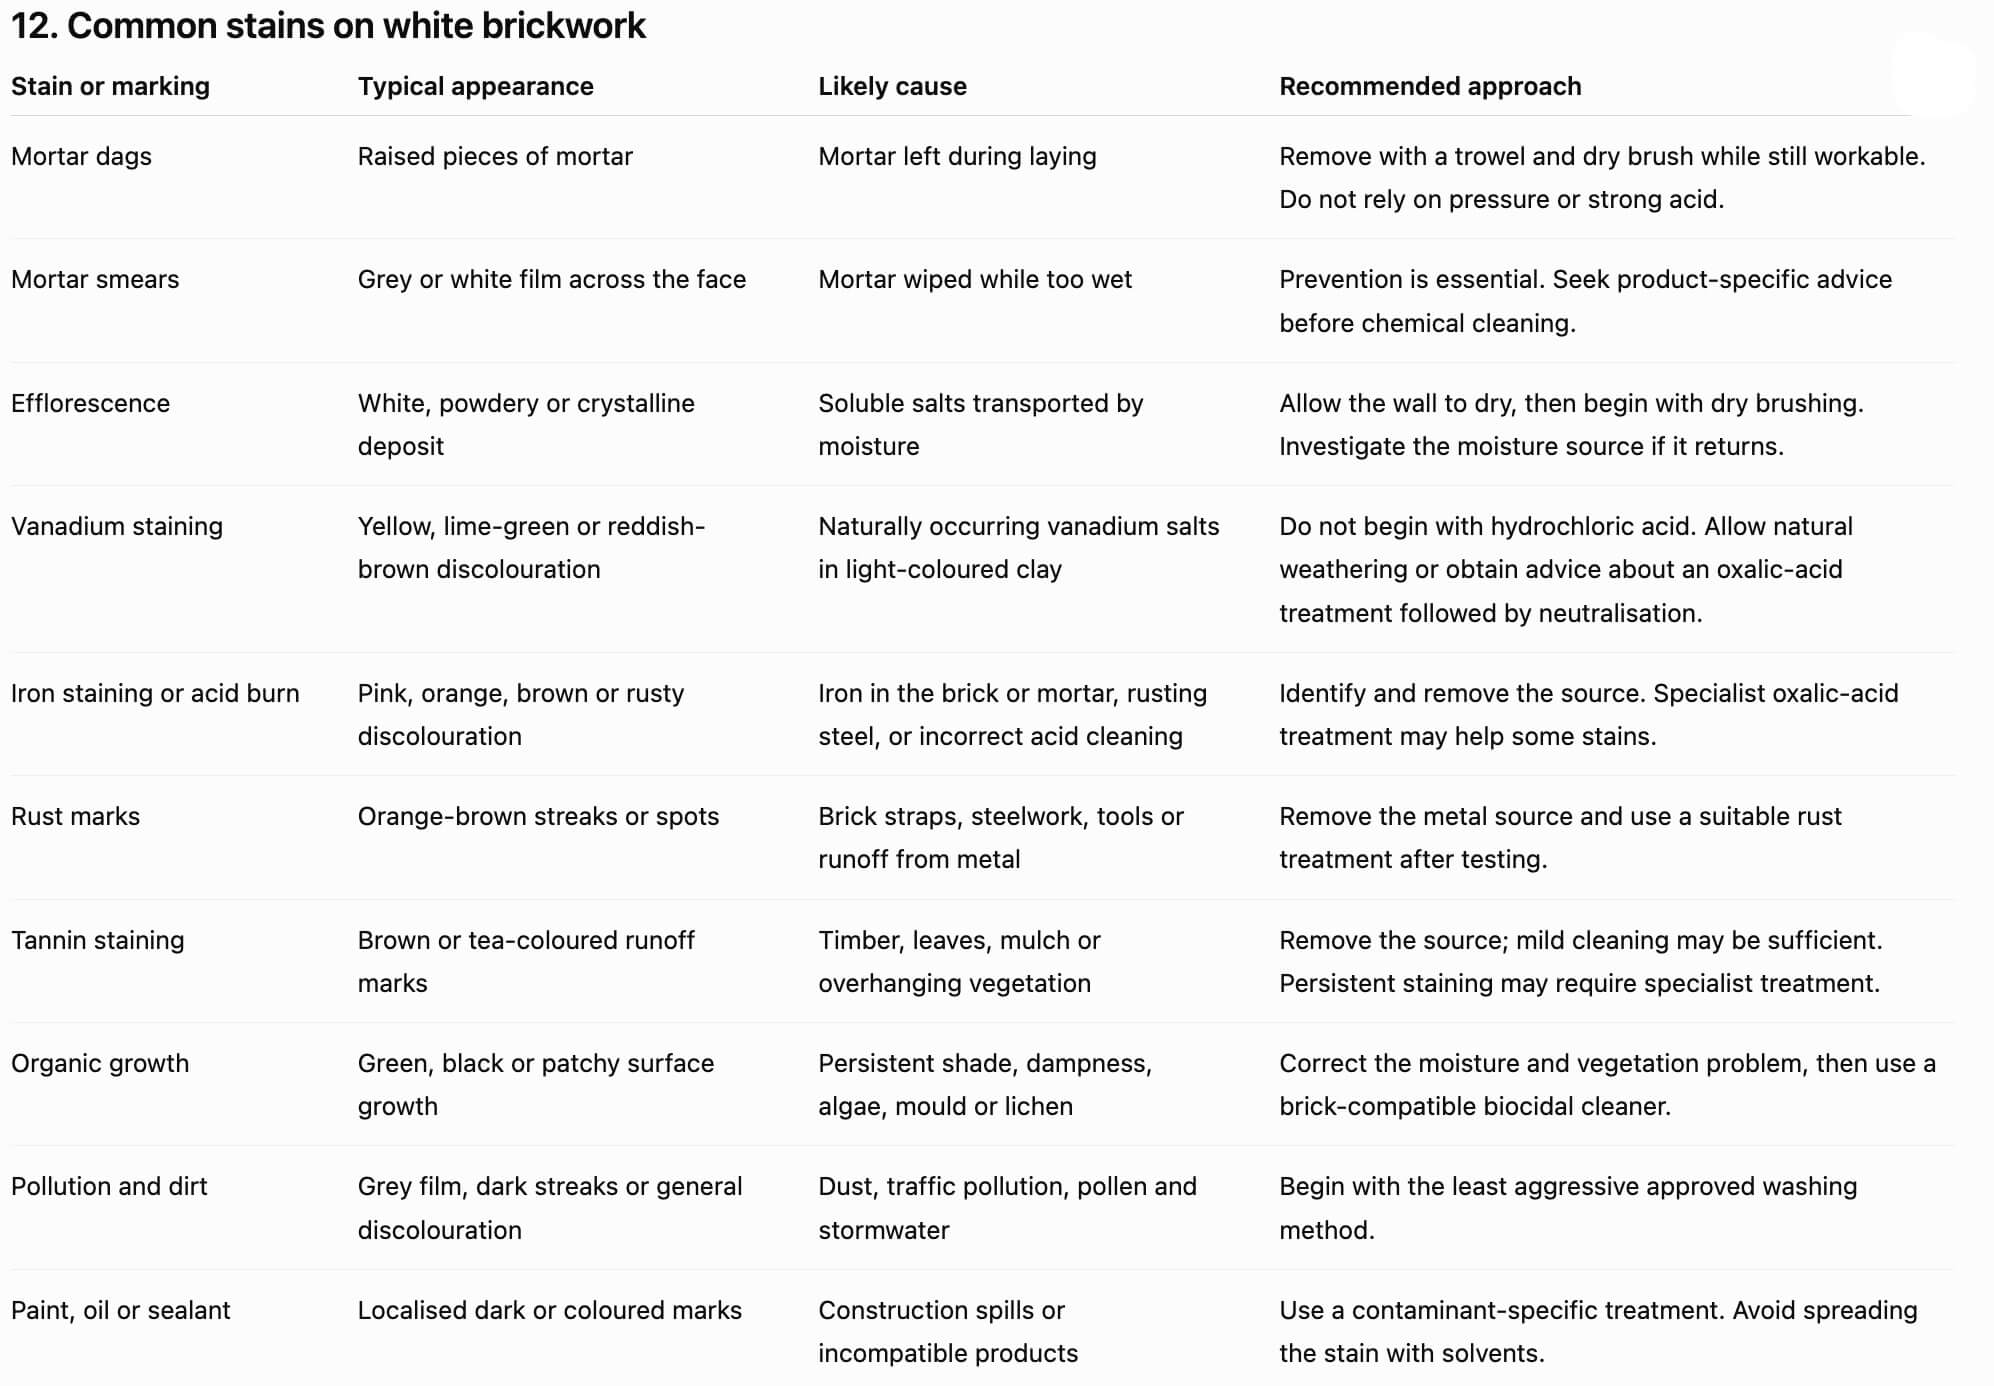
Efflorescence occurs when water dissolves naturally occurring salts in bricks, mortar, soil or adjacent materials. As the water moves to the surface and evaporates, the salts are deposited as a white powder or crystalline film.
Efflorescence is generally cosmetic and does not mean the bricks are failing. However, persistent or concentrated efflorescence may indicate ongoing water entry.
To manage efflorescence:
Do not automatically use hydrochloric acid. It is not the default treatment for efflorescence and may damage mortar or create additional staining. See Elephant Brick Co’s Understanding Efflorescence Guide
Light-coloured clays may contain naturally occurring vanadium salts. These salts are normally colourless but can appear yellow, green or reddish-brown after excessive wetting or inappropriate acid cleaning.
Vanadium staining:
Hydrochloric acid can darken or “fix” vanadium staining, making it considerably harder to remove. Any suspected vanadium stain should therefore be identified and treated before conventional mortar-residue cleaning.
Where treatment is necessary, an appropriate oxalic-acid solution may be used, followed by a neutralising wash. Because the correct concentration and method depend on the product and extent of staining, this should be confirmed with the brick supplier or completed by an experienced brick cleaner.
Pink, orange, red-brown or rusty staining can originate from:
Fresh mortar is highly alkaline. Under some conditions, iron in the mortar sand can migrate to the surface and oxidise, creating pink or orange staining that is particularly noticeable on white brickwork.
Incorrect acid cleaning may produce “acid burn,” permanently altering both the brick and mortar. Common causes include using excessive acid, applying acid to a dry wall, allowing the solution to dry on the surface, or failing to rinse thoroughly.
Oxalic-acid-based treatments may assist with some iron stains, but the source and brick type must first be identified.
White brickwork can show stains from oils and tannins released by trees, leaves and timber. Airborne dust, pollen and urban pollution can also accumulate on rough or porous surfaces. Stormwater may then concentrate these contaminants into visible streaks.
Good design and maintenance can reduce the problem:
Where organic growth is present, treat the biological cause with an appropriate masonry-safe cleaner. Aggressive pressure washing may remove the visible growth while leaving roots or spores behind and damaging the surface.
Sealing is not essential for every white brick wall, but it can be a sensible option where:
Use only a breathable sealer specifically approved for clay masonry. A breathable product helps resist liquid water while allowing water vapour to escape.
Before sealing:
Sealers do not make brickwork maintenance-free and may require renewal. They can also change the colour or sheen, so testing is essential.
Before construction:
During construction:
Before cleaning:
This guide provides general information only. Brick composition, surface treatments, mortar and staining conditions vary considerably. Product-specific instructions supplied by Elephant Brick Co take precedence over general cleaning advice. Chemical cleaners should only be used in accordance with the manufacturer’s safety directions, after testing, and preferably by a suitably experienced professional.
24 Aug 2026

20 Aug 2026

06 Aug 2026

04 Mar 2026

29 Jan 2026

23 Jan 2026